Categories
Uncategorized

More/hardware/shared

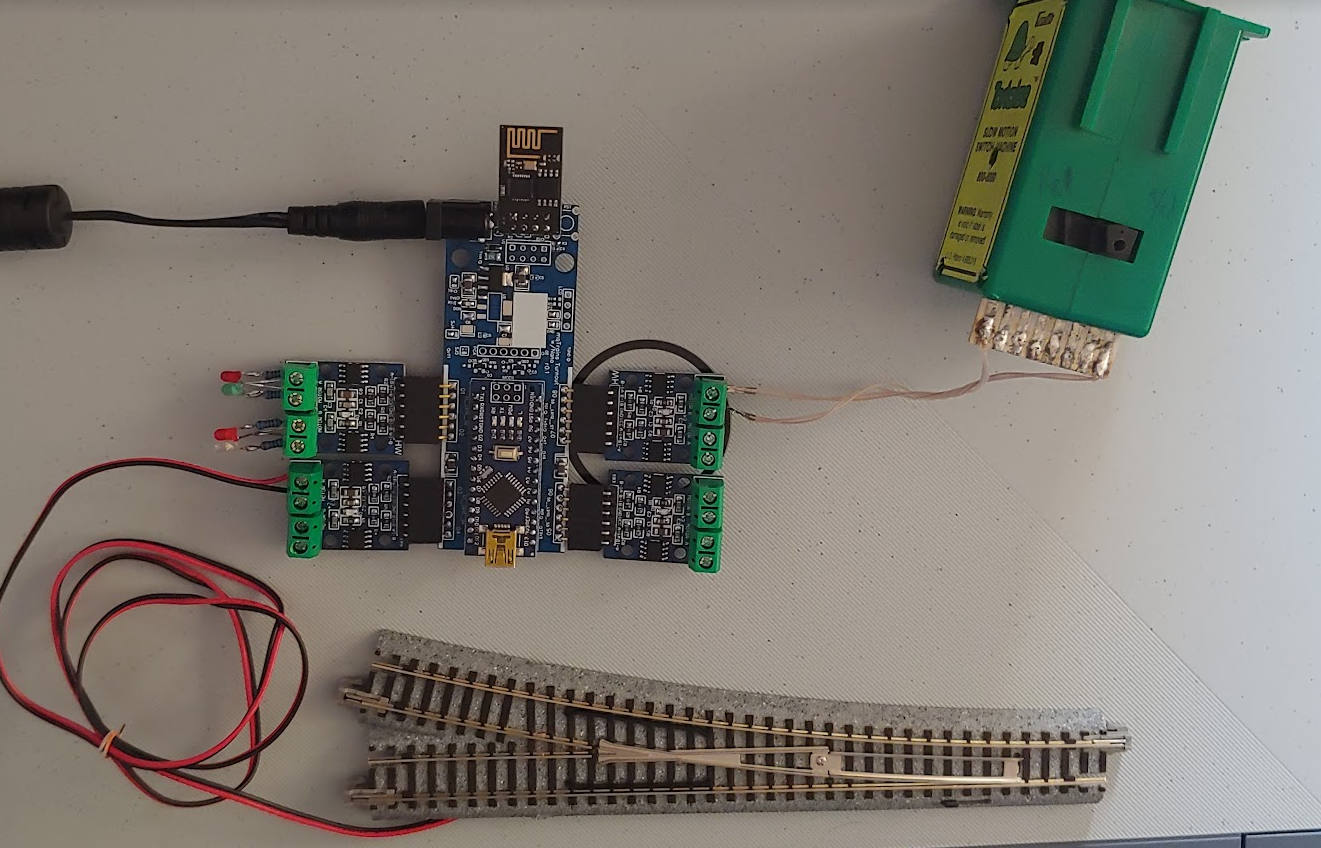
Ever want to control a snapping or momentary-coil-action turnout or device, like Kato, Atlas and others make. But, we only have 2 pins (already used for i2c), and you have 8 turnouts??? So why not put an inexpensive Arduino Nano in the way? And use it to control 4 x L9110S dual h-bridge control boards?

As it turns out, when you set the time to be ON in milliseconds to zero, it will STAY on and thus drive ANY stallmotor turnout too! So TortoiseTM, here we are…

We called it the “mqTrains Turnout Nano” and have it labelled as mqTrains_TurnoutNano_only. Very easily found with a search at OSHWLab: https://oshwlab.com/search?wd=mqtrains

The code for the Nano and ESP will appear on github shortly…

TortoiseTM is most likely trademarked by Circuitron Inc.

Categories
Uncategorized

Debugging/your/MQTT help!

Starting mosquitto from the command line, you can use the ‘-v’ (or ‘–verbose’) option for showing verbose messages…this will override the logtype option in the config file. So first step, when something is not going right, start the MQTT server manually with mosquitto -v and watch what the server does while you debug the problem.

If you don’t have direct access to the Broker/Server, you can also check out MQTTBox http://workswithweb.com/mqttbox.html, works on most platforms…great tip from David B., thank you.

Create a new MQTT Client, with some unique MQTT Client Name (MeBox will work), select the protocol you are using in your application, and enter the hostname or IP address for the Host. Enter Username and Password, if used, and check or uncheck all the other boxes that are application to your setup. Then click Save and selecting the “MeBox” client in the list, will allow you to add Publishers to Publish to a Topic, or Subscribers to Subscribe to one or more Topics, with the wildcards (Single Level ‘+’ and Multilevel ‘#’) , as usual.

Very easy to monitor and interact with the MQTT Server: a Published message has a “Publish again” arrow, avoiding quite a but of typing.; restarting MQTTBox will automatically connect (if the option was selected), but you will need to click the Subscribe button in each Subscriber window.

Categories
Uncategorized

Uploading/code/to/ESP8266/with mqTrains_xxx.bin

Monitoring the verbose output in the debug window in the Arduino 1.8.12 IDE, we see:

C:\Users\name\AppData\Local\Arduino15\packages\esp8266\tools\python3\3.7.2-post1/python3 C:\Users\name\AppData\Local\Arduino15\packages\esp8266\hardware\esp8266\2.7.0/tools/upload.py --chip esp8266 --port COM4 --baud 115200 --before default_reset --after hard_reset write_flash 0x0 mqTrainsIO_xxx.bin
esptool.py v2.8
Serial port COM4
Connecting......_

Enable verbose output with Settings (Ctrl+Comma). File -> Preferences -> Show verbose output during: [ x ] compilation [ x ] upload

So, if we do this in Linux or on a Mac or Raspberry Pi:
All we need is
sudo apt-get update
sudo apt-get install python python-pip
sudo pip install esptool

And then

esptool.py --chip esp8266 --port /dev/ ttyUSB0 --baud 460800 --before default_reset --after hard_reset write_flash 0x0 mqTrains_ServoPCA_1.0_1MB.bin

For the Windows kind, there is a Nodemcu-Flasher tool here in a 32 and 64 bit version which you can specify the bin file on the Config tab:

Set the appropriate Flash Size, Flash speed and SPI Mode on the Advanced tab:

And then head back to the Operation tab and a click “Flash(F)”:

Of course, the Windows device driver needs to be in place for the USB programmer you are using (COM7 shown here).

We also recommend using this little DYI Mall programmer which avoids the slide switch at power up to be in program mode, but instead gives you a reset button and the same 8 pins on the ESP-01 to connect to the next i2c board:

Categories
Uncategorized

Setting/up/MQTT/Broker mosquitto

Download:
https://mosquitto.org/
https://mosquitto.org/download/

Windows:
mosquitto-1.6.12a-install-windows-x64.exe (example)

Select Files and Service

To start the service, Computer Management (right-click on My Computer, Manage) -> Services and Applications->Services->Mosquitto Broker->right click->Start

(You can also set the service to Automatic in right click on the service->Properties->Startup type)

If not run as a service, you can start it with
C:\”Program Files”\mosquitto\mosquitto.exe -v -c “C:\Program Files\mosquitto\mosquitto.conf”

To test, run:
C:\Program Files\mosquitto\mosquitto_sub -h localhost -v -t “TxNamib/#”

If the service is not running or accessible, the error wil show:
Error: No connection could be made because the target machine actively refused it.

Else, you will only see a message if it was “retained”, or you publish something to TxNamib now
C:\”Program Files”\mosquitto\mosquitto_pub -h localhost -t “TxNamib/servo.2003/03” -r -m “CLOSED”
or
C:\”Program Files”\mosquitto\mosquitto_pub -h localhost -t “TxNamib/servo.2003/03” -r -m “THROWN”

Ubuntu and Raspberry Pi (3, 4, 400 and Zero W):
sudo apt-get install mosquitto

or

snap install mosquitto

Older versions of Ubuntu:
sudo apt-add-repository ppa:mosquitto-dev/mosquitto-ppa
sudo apt-get update

Categories
Uncategorized

We/are/live TRUE

Welcome to the mqTrains WordPress site. This is our first post!